

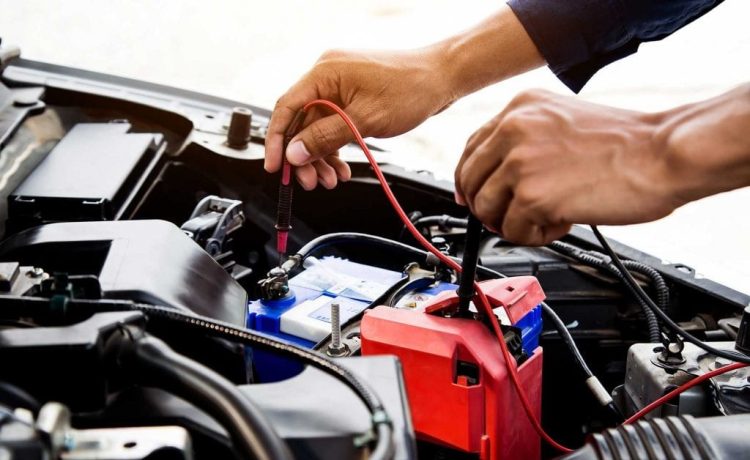
Modern vehicles feature intricate electrical networks that control everything from engine ignition and fuel delivery to power windows and digital infotainment systems. When an electrical component fails, many home mechanics feel hesitant to attempt repairs due to fears of electrical shock, blown fuses, or fried onboard computers. Working on twelve-volt automotive electrical systems is manageable and safe when approached with proper preparation, systematic troubleshooting, and correct safety protocols.
Understanding electrical principles and maintaining strict safety guidelines allows home mechanics to diagnose and repair vehicle electrical issues without risking injury or damaging expensive electronics.
Essential Safety Gear and Working Environment Setup
Working safely on automotive electrical circuits begins long before touching a wrench or disconnecting a battery cable. Creating a controlled workspace reduces hazards associated with short circuits, sparks, and battery acid leaks.
Before beginning any electrical repair, gather and check essential protective equipment:
-
Safety Glasses with Side Shields: Protects eyes from accidental metal arc sparks, dirt debris under the dash, and battery acid splashes during testing.
-
Insulated Mechanics Gloves: Offers grip while shielding skin against unexpected current arcs, sharp metal chassis edges, and hot engine components.
-
Non-Conductive Footwear: Wearing rubber-soled shoes isolates your body from the ground, reducing static accumulation and electrical grounding risks.
-
Clear Work Area: Work in a well-ventilated garage or open driveway free from standing water, flammable chemical vapors, or loose paper debris.
-
Removal of Metallic Jewelry: Remove rings, metal watches, bracelets, and neck chains prior to opening the hood. A metal ring shorting between a live battery terminal and the steel frame can cause severe burns within milliseconds.
Setting up a organized work bay keeps testing tools within reach and prevents accidental short circuits caused by dropped tools across live battery posts.
Understanding Automotive Voltage and Current Hazards
A common misconception among beginner mechanics is that twelve-volt automotive systems are completely harmless because the voltage is relatively low compared to household outlets. While twelve volts direct current will rarely push dangerous electrical current through dry human skin, a standard lead-acid car battery holds hundreds of cold cranking amps capable of dumping massive thermal energy instantly if shorted out directly.
A short circuit occurs when a positive wire touches a ground point without passing through a load, such as a bulb, motor, or resistor. Unrestricted current flow generates intense heat immediately, melting wire insulation, fusing metal components, and potentially igniting fuel vapors or causing battery cell explosions.
Lead-acid batteries also release explosive hydrogen gas during charging and heavy discharging cycles. Introducing a spark near a battery terminal can ignite surrounding gas pockets, rupturing the plastic casing and showering the engine bay with sulfuric acid. Recognizing these hazards reinforces why disconnect procedures must always follow strict sequences.
Safe Battery Disconnection and Connection Procedures
The lead-acid or glass-mat battery represents the central power hub for the entire vehicle. Before replacing sensors, repairing frayed wiring harnesses, or removing electrical modules, disconnecting the battery isolates the electrical system from potential short circuits.
Following the proper terminal removal sequence prevents accidental arc sparks:
-
Always Disconnect the Negative Terminal First: The negative battery terminal connects directly to the metal frame and engine block of the vehicle, serving as the common ground. Removing the negative cable terminal first eliminates the grounding pathway. If your metal wrench accidentally touches the steel chassis while loosening the negative terminal bolt, no short circuit occurs because both surfaces share the same electrical potential.
-
Protect the Disconnected Terminal: Tuck the disconnected negative cable into an insulated plastic sleeve or position it away from the battery post to ensure it cannot spring back and contact the terminal during repair work.
-
Disconnect the Positive Terminal Second: Once the negative cable is isolated, loosen and remove the positive terminal cable. With the ground path completely open, touching adjacent chassis metal with a wrench while unbolting the positive terminal will not trigger a spark.
-
Reconnection Sequence in Reverse: When job tasks are finished, attach the positive cable terminal first and tighten it securely. Finish by attaching the negative terminal last, accepting that a minor, harmless contact spark may occur as vehicle memory modules re-energize.
Adhering to this disconnection process protects your vehicle’s sensitive microprocessors from voltage spikes and shields you from arc burns.
Essential Tools for Home Automotive Electrical Troubleshooting
Accurate diagnosis prevents unneeded component replacements. Investing in a few fundamental, high-quality electrical diagnostic tools makes identifying open circuits, high resistance, and shorted ground wires straightforward.
Standard diagnostic equipment for home mechanics includes:
-
Digital Multimeter: A digital meter measuring direct current voltage, resistance, and continuity is indispensable. Select a meter with at least ten mega-ohms of internal input impedance to protect delicate engine control modules during testing.
-
Standard Twelve-Volt Test Light: A simple bulb test light connected to a ground probe provides quick visual confirmation of power along fuse panels, relay sockets, and lighting circuits.
-
Computer-Safe LED Test Light: Draws minimal micro-amperage current, making it safe to probe sensor signal lines without overloading internal computer circuitry.
-
Wire Strippers and Precision Crimpers: Clean wire stripping prevents severed copper strands, ensuring full amp-carrying capacity across splices.
-
Heat Shrink Tubing and Heat Gun: Provides waterproof, abrasion-resistant insulation over repaired wire connections, far outperforming standard vinyl electrical tape over time.
Having reliable diagnostic tools allows you to pinpoint electrical failures precisely without guessing.
Step-by-Step Electrical Troubleshooting Workflow
Tracing an electrical issue without a systematic approach leads to frustration and wasted money on unneeded parts. Developing a step-by-step diagnostic process simplifies finding broken connections and blown components.
Follow this troubleshooting procedure to isolate electrical faults logically:
-
Verify the Customer Complaint and Basics: Confirm the symptom directly. Check overall battery condition using a multimeter. A healthy, fully charged twelve-volt battery should measure between twelve point six and twelve point eight volts with the engine off.
-
Inspect the Fuse and Relay Panel: Locate the fuse box serving the malfunctioning circuit using the owner manual diagram. Inspect the fuse filament visually or check for voltage on both exposed top test ports with a test light. If a fuse is blown, inspect the circuit for shorted wires before installing a replacement fuse of identical amperage rating.
-
Verify Ground Circuit Integrity: More than half of all intermittent automotive electrical issues stem from loose, rusted, or corroded ground contacts. Measure voltage drop between the ground pin of the load component and the negative battery post; any reading exceeding zero point two volts indicates elevated resistance along the ground path.
-
Check Load Supply Voltage: Measure incoming voltage at the electrical harness connector while the circuit is turned on under load. If incoming voltage matches battery potential and the ground circuit tests clean, the receiving load device itself has failed internally.
-
Perform Proper Wire Repairs: If damaged wiring is identified, cut out the degraded section, slide heat shrink tubing over one side, solder or crimp the copper joint using a quality butt connector, and seal the repair using a heat gun until weatherproofing sealant squeezes out the ends.
Methodical testing isolates faults quickly, preventing accidental short circuits during reassembly.
Frequently Asked Questions
Why is it dangerous to replace a blown fuse with one that has a higher amperage rating?
Fuses are engineered to act as deliberate weak points designed to melt and open the circuit when electrical current exceeds safe wire tolerances. Installing a higher amperage fuse allows excessive current to flow through thin wiring during a short circuit, causing the wire insulation to melt, short out adjacent wiring harnesses, and potentially cause a severe vehicle fire.
What is the difference between a short circuit and an open circuit?
An open circuit occurs when an electrical pathway is broken by a snapped wire, blown fuse, or loose connector pin, completely stopping current flow and leaving the component inoperative. A short circuit happens when live electrical current bypasses the intended load by contacting an unintended ground or secondary wire, causing fuses to blow immediately or secondary components to operate unexpectedly.
Can I safely use a standard test light on modern vehicle computer sensors?
Standard incandescent test lights draw several hundred milliamperes of current to illuminate their internal bulb. Connecting a standard test light to delicate engine control unit signal lines or sensor circuits can overload and permanently damage internal computer transistors. Always use a high-impedance digital multimeter or a specialized LED test light when probing computer-controlled circuits.
How do I locate a parasitic battery drain that empties my car battery overnight?
To test for a parasitic drain, set a digital multimeter to measure direct current amperage and place it in series between the disconnected negative battery post and the negative cable terminal. Allow vehicle computer networks to enter sleep mode, then observe the milliamp reading. A reading higher than fifty milliamperes indicates an active drain, which can be isolated by pulling individual fuses one at a time until the current draw drops back into normal limits.
Is it safe to jump-start a car with a completely flat battery using a portable jump pack?
Yes, using a quality lithium-ion jump pack is safe provided correct cable polarities are observed. Connect the red clamp to the positive battery terminal first, and attach the black clamp to a clean, unpainted metal ground point on the engine block away from the battery. Connecting ground away from the battery prevents potential sparks from igniting hydrogen gas lingering around the battery casing.
Why should electrical tape not be used as a permanent wire repair cover under the hood?
Standard vinyl electrical tape breaks down quickly when exposed to engine heat, oil vapors, and moisture. Over time, the adhesive softens, causing the tape to uncoil and expose bare copper wire to engine vibration and grounding risks. Dual-wall heat shrink tubing with internal adhesive provides a permanent, waterproof seal that resists thermal degradation and environmental chemical exposure.
What causes terminal corrosion on car batteries, and how should it be cleaned safely?
Battery terminal corrosion appears as a white, blue, or greenish powdery crust formed when escaping hydrogen gas reacts with copper and lead terminals. Clean it safely by wearing eye protection and gloves, disconnecting the terminals, applying a neutralizing mixture of baking soda and water, and scrubbing the metal posts with a dedicated terminal wire brush before reassembling and applying dielectric grease.